Author Archives: Rebecca Miller

The easiest way to add video to a blog post

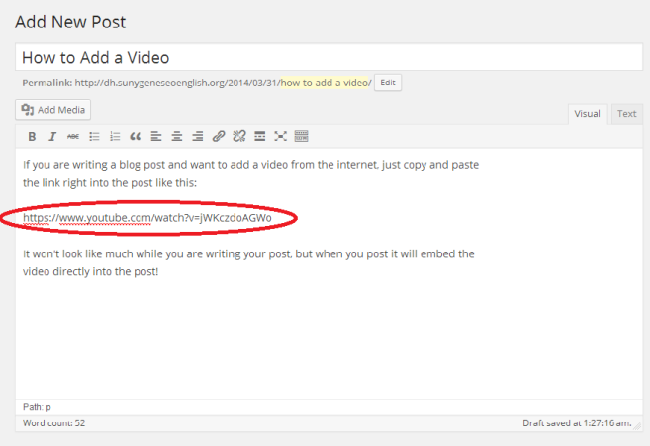
If you are writing a blog post and want to add a video from the internet, just copy and paste the link right into the post like this:

Image

It won’t look like much while you are writing your post, but when you post it will embed the video directly into the post! This is the easiest way to put a video into the post and all it takes is copying and pasting. If you’re unsure about if it looks good or not, there is always the option to look at the preview by clicking the preview button on the right.

Image


Happy posting

Not what’s the difference between a forum and a blog?

Very simply, a forum is an older version of self expression and is similar to that of a bulletin board. It is a niche specific thread, as it allows the author to attract like-minded people to their interests. The commentator is able to choose which thread they wish to leave their opinions on.

A blog is similar to creating your own webpage and typically has templates to choose from, meaning your page is automatically set up and just needs to be customized to your liking! It is similar to an online diary, where anyone can read and leave a comment.

A forum is more discussion based and tends to turn into something like a debate, which is perfect to stimulate conversations in the classroom. Our class tends to flow smoothly with using the forum, however a blog can do the same and tends to be more for ones who seek to express themselves freely across the internet.

Now what position do you wish to take? Choose wisely!

How to Log In

Go to sunygeneseoenglish.org. You will see “Log in” in the top left corner. Click this, and it will bring you to a page that asks for your user name and password. Enter this information, and you will be logged in, and now have the access to go to your group and post in a blog or forum.

How to Post in the Forum

Find your group and go to that page. On the left hand side you will see the “Forum” option. Click this. There will be an option for Topics. Click on the topic you wish to comment about. Scroll down until you see were it says “Reply To: Topic.” Type your response in that box. There will be a check box that says “notify me of follow-up replies via email.” Click this if you wish to get an email notification about replies to your post. If not, leave it unmarked. When you have finished your reply hit the “submit” button at the bottom right of the reply box. You will see your post pop up under the most recent one.

How to Post in the Blog

Find your group and go to that page. On the left hand side you will see the “Document” option. Click this. This will bring you to the group blog. To make a new blog post, hold your mouse over “+New” on the toolbar at the top of the page. You will see an option that says “Post.” Click this. This will bring you to a new page where you will be asked to create a title for your post. Then you may type your response in the textbox below. When you have finished, look to the options on the right of your textbox. Click the blue “Publish” button when your post is complete and you wish to post it to the blog. This may take a few seconds. A notification will come up telling you that your post was successful and you may click there to view it. Click on that text and you may view your post.

Spice Up Your Posts: Adding Images

In this post, we’ll be discussing how to add various media to blog posts on WordPress, specifically focusing on embedding images and videos. Adding images and videos to posts can add to the sophistication of a blog, and there are several tricks you can use to make them aesthetically flow into a post.

Let’s start with images:

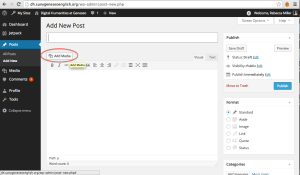
If you’re posting on the blog and not the forum option, begin by going to the top of the screen on your blog homepage, and selecting “+ New” and scrolling down to select “Post.” This will take you to a page that looks like the screenshot below. Select the “Add Media” button circled in red.
Screen Shot 2014-03-30 at 10.38.06 PM

Next, your first option is to drag your desired image anywhere onto the page under either the “Upload Files” or Media Library” tabs. The image will automatically be uploaded. Or, under the “Upload Files” tab you can search for files under on your computer. If you want to insert the image via URL, choose the “Insert from URL” option on the left hand side of the page. Also use the options on the left if the image you want to imbed is a tweet.

Once your image is uploaded, to the right of the page you’ll see a column titled, “Attachment Details.” This is where you can really customize your image. For example, by typing into the box labeled “Caption” indicated by the red arrow in the image below, you can add what will appear as a small caption below your image in the published post.
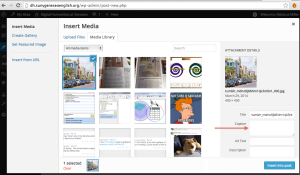
Screen Shot 2014-03-30 at 10.50.59 PMIn addition, you can make the text wrap around the image by changing the alignment. If you align the image to the left, the text will wrap around the right of the image, etc. This makes images really flow into your post without being choppy.
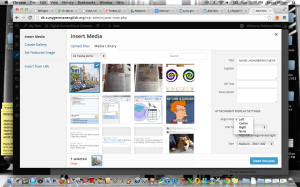
Screen Shot 2014-03-30 at 10.56.14 PMAn image aligned to the right with a caption appears like this:
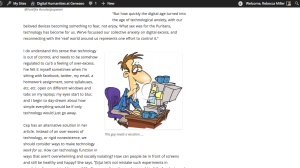
Screen Shot 2014-03-30 at 11.03.05 PM
Now, if you’re trying to post an image in a forum discussion, it’s very simple and much the same. Simply scroll to the bottom of the conversation page and type in the “Reply To:” Box. To post an image click on the button with the music note and camera. You must type in an image url to upload it, but image alignment works the same way. You can also customize the size of the image.